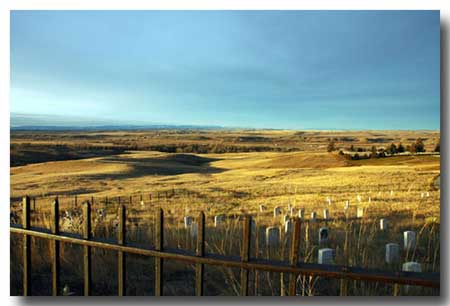
On this page we will show you the different parts of
the battlefield in the order the battle progressed. This is not a
complete picture of everything but, at least, it gives you a good
perspective of what happened and where.
Martin Pate's wayside exhibit paintings add to our
narrative. Each wayside, placed along the battlefield road, depict
portions of the battle near where the wayside is located. Thanks to
Martin Pate for allowing us exclusive use of these paintings.
Below are two maps in pdf format for you to review as
you study Custer's Last Stand.
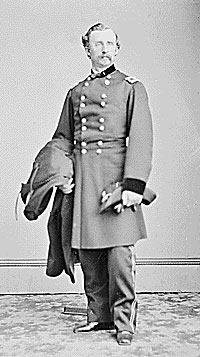
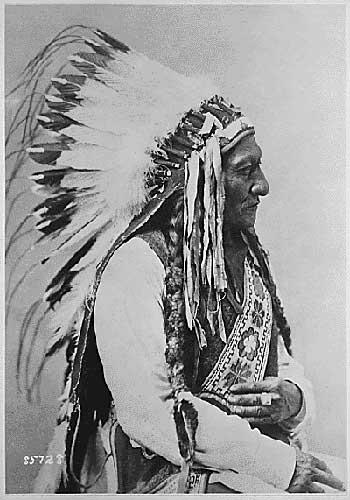
Lt. Col. George
Armstrong Custer -- Photos courtesy National Archives
Located in the Wolf Mountains, near the hill called the Crow's Nest, about noon on June
25, 1876, Lt. Col George Armstrong Custer divided 12 companies of the
7th U.S. Cavalry into three battalions.
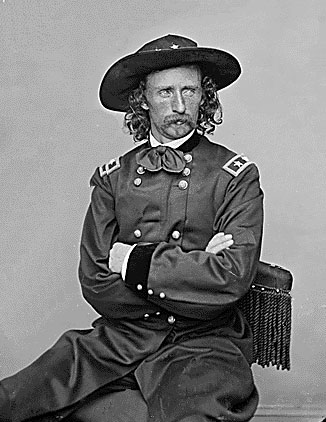
Captain Frederick Benteen would command companies D, H, and K and scout to the
south and west looking for possible scattering Indians. Major Marcus Reno
would command companies A, G, M and Custer would command companies C, E, F, I,
and L. Company B under the command of Captain McDougall would
guard the pack train, comprised of mules, carrying the supplies and extra ammunition.
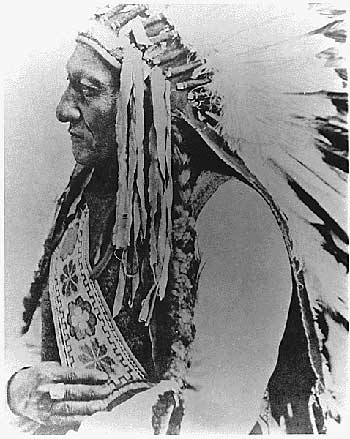
Captain
Fredrick Benteen
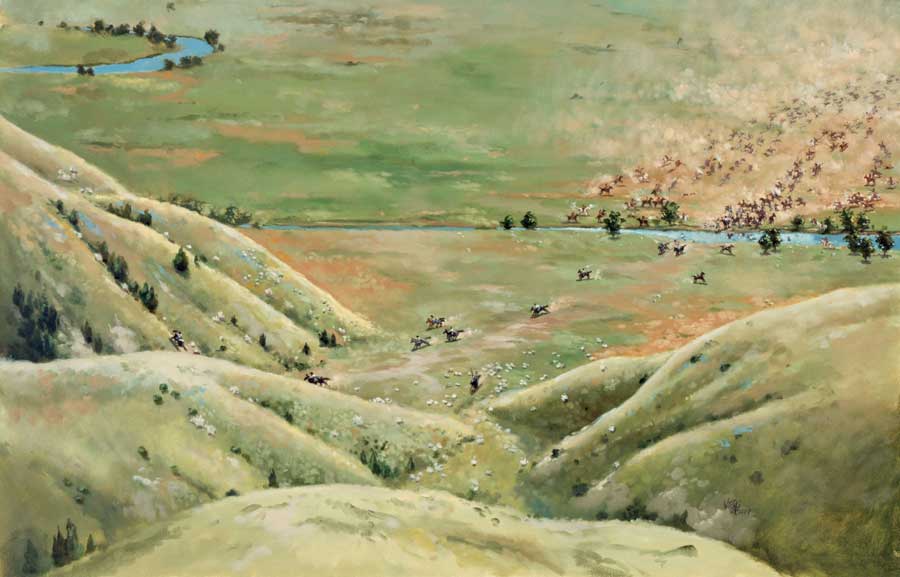
The Battle Begins -- Reno Charges The Village
1.
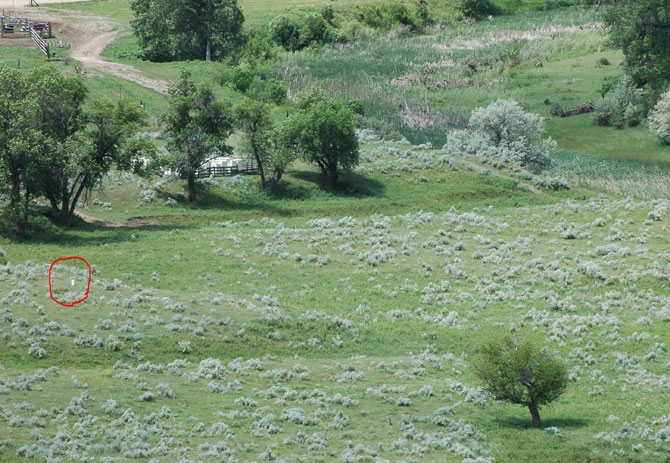
Picture 1 looks south-- As with all photos, please
click on Picture 1 to enlarge and observe the paths of Custer and Reno
taken during this phase of the battle.
After Benteen began his scout, Custer and
Reno marched toward the Little Bighorn River along today's
Reno Creek, 15 miles to the west from where
George Custer divided his troops.
Near the confluence of Reno Creek and the Little
Bighorn River, Custer ordered Reno to charge down the
valley of the Little Bighorn and attack the village. The village
provided a strong and determined fighting force of nearly 2,000
warriors. Some of the principal war leaders were Crazy Horse of the Lakota
Sioux; Sitting Bull and Gall from the Hunkpapa Sioux; and Lame White
Man of the Southern Cheyenne. The last statement
Custer personally gave to Reno was that he would support Reno with the entire outfit.
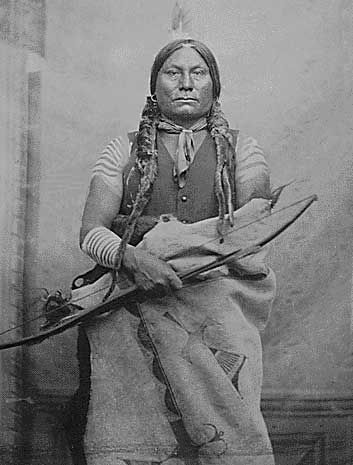
Sitting Bull --
Photos courtesy National Archives
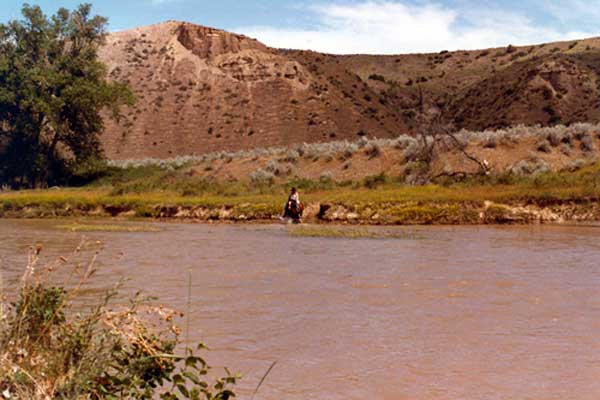
While Reno's soldiers struggled against the current of the Little Bighorn River
in order to cross to its west bank, Custer pointed his horse north to
follow the bluffs east
of the river. Custer led a battalion of five companies totaling 210 men towards fate:
he had witnessed his last sunrise on
earth.
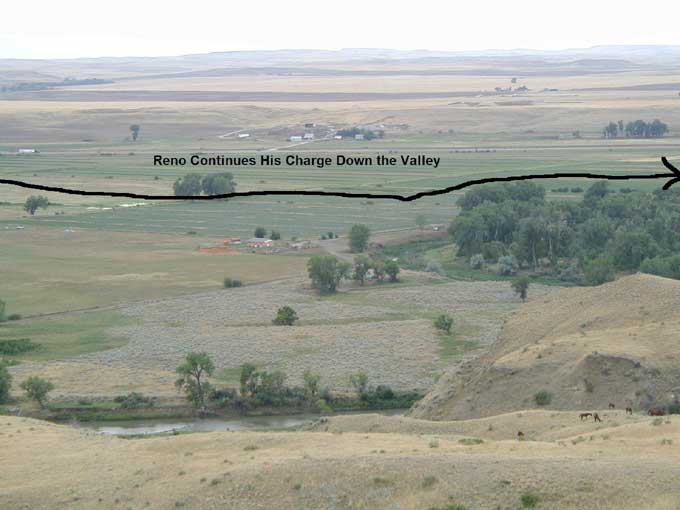
2. 2a.
Picture 2 looks west--Reno continued his
charge down the valley of the LBH. His troops broke formation a bit
after passing through a prairie dog village, but then reformed and
continued on.
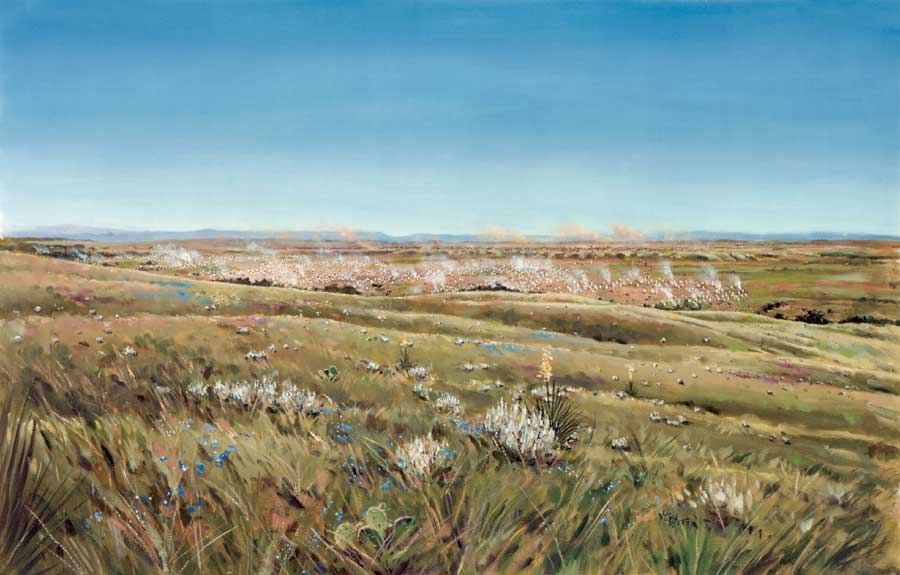
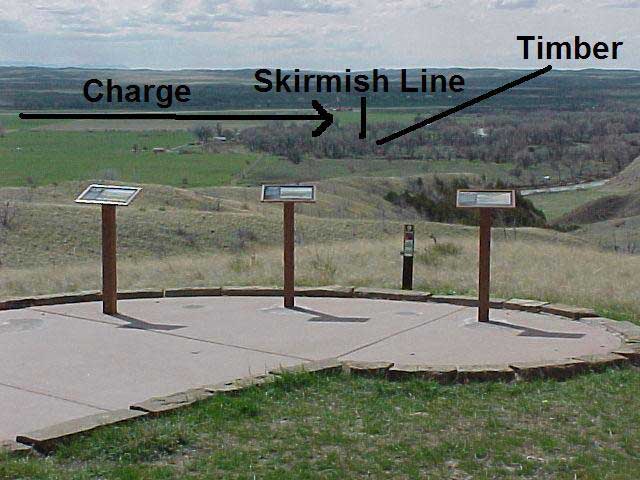
Picture 3 looks west--Reno's charge ended with warriors to his front. Reno's battalion
dismounted and formed a skirmish line across the valley firing from
there for about 15 minutes until it turned about into the timber.
During the opening moments of the Valley Fight soldier shots missed
but hit noncombatants in the village. Hunkpapa leader, Gall, would
lose two wives and three children from these soldier guns. He would
later relate that he was so angered by this that he entered the battle
armed only with a war club.
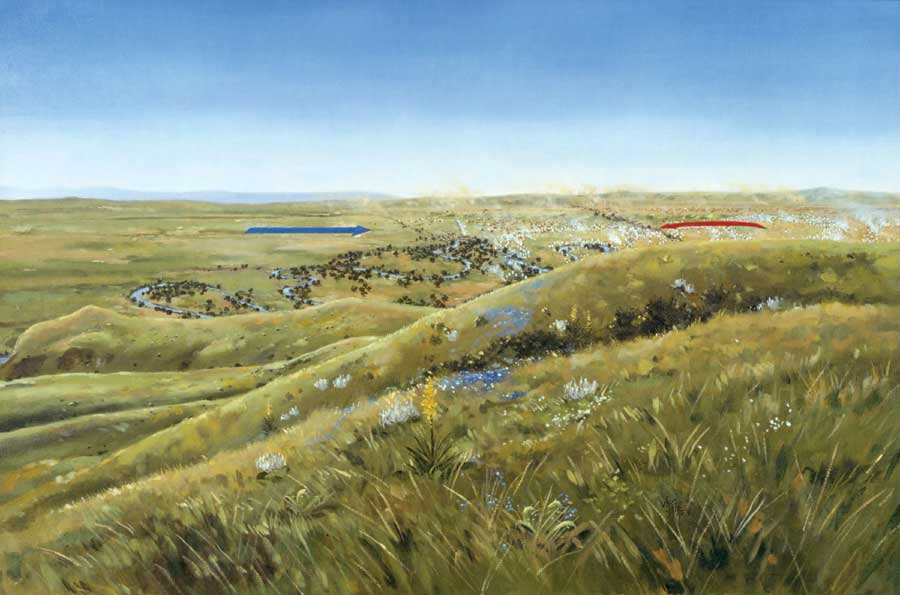
Picture 3a. -- Pate's "Reno's Valley Fight"
Gall
-- Photos courtesy National
Archives
Reno Retreats
4.
4a.
Picture 4 looks south--Reno held the timber about 10-15 minutes before his
command made a quick retreat back in the direction they came
from. The Indian pressure was strong forcing the battalion to turn
towards the LBH short of Reno Creek. Indians were pulling soldiers
from their saddles, shooting and killing them point blank. Reno would
lose nearly 30 men during this retreat. When the soldier's reached
the LBH it was every man for himself. Either on horseback or foot, the
soldiers made their way up these bluffs to what is today the
Reno-Benteen Battlefield.
Picture 4a looks east --
Reno's troops crossed the river in this location toward the bluffs on the
east side of the river.
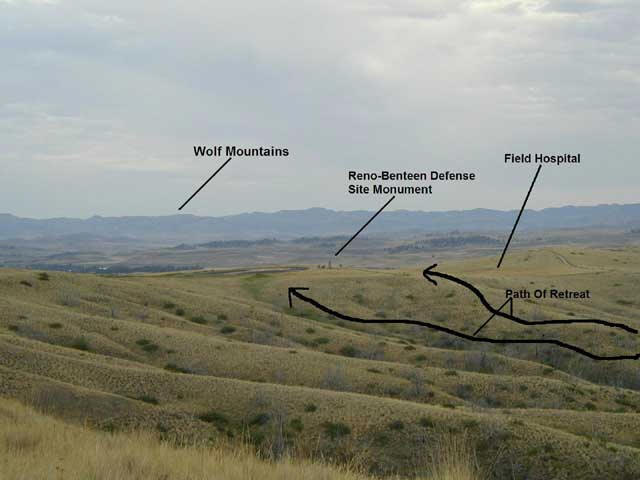
5.
5a.
Picture 5--Pate's "Retreat Across The Little Bighorn."
Picture 5a looks south--A view of the continued path of retreat, the
Reno-Benteen Battlefield Monument and the location of the field
hospital June 25-26, 1876.
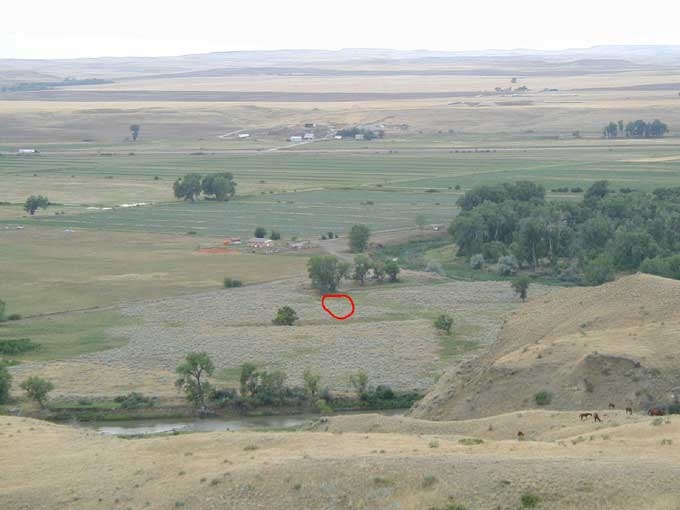
6.
6a.
6b. 6c.
Picture 6, 6a, and 6b looks west--In 1993, Jason Pitsch found remains on his land
of a 7th Cavalry horse. Also discovered in the immediate area of the
horse were a pocket watch, pocket knife, and a
toothbrush with the initials J.S. carved into it. Archeologists believe the horse
and personal items could belong to John Sivertsen, of Company M, who
survived the battle.
In 1994, not far from where the horse
remains were discovered, Mr. Pitsch found partial remains of two
individuals.
The human remains were excavated by Melissa Connor and Dick Harmon
with assistance from Mr. Pitsch. Later analysis determined one set of remains were of a middle
aged or older Indian woman. Her time of death -- before, during, or
after the battle -- will forever remain a mystery. She was interred in
a cemetery on the Crow Reservation in May 1994.
The other set of remains were of a 7th Cavalry soldier. Analysis for
race was inconclusive with evidence supporting both white or black.
Can scientists ever identify this cavalryman? Most likely, this lone
soldier -- buried in the Custer National Cemetery -- will also
remain another mystery of the Battle of the Little Bighorn. Dr.
Douglas Scott wrote about this soldier in his remarkable book, They Died With Custer: Soldiers' Bones from the Battle of the Little Bighorn in which he listed six possibilities for
identification of this
individual:
Corporal James Dalious, CO A
Private Richard Rollins, CO A
Private Benjamin F. Rogers, CO G
Private Edward Stanley, CO G
Corporal Otto Hagemann, CO G
Isaiah Dorman, Interpreter and the only black to die in the battle.
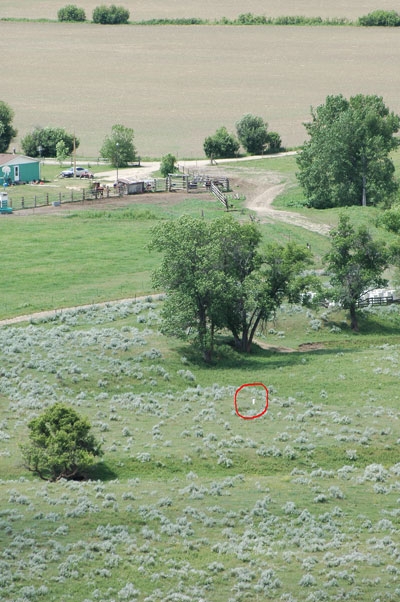
In 1995, the National Park Service placed a granite marker
for the unknown soldier as seen within the red circle of photos 6, 6a,
and 6b above.
Picture 6b looks SE -- This is the area that Mr. Pitsch found the remains
of the 7th Cavalry horse. You can see the bluffs along the Little
Bighorn River through the gap in the trees.
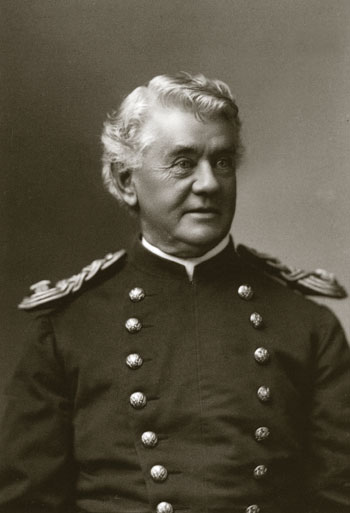
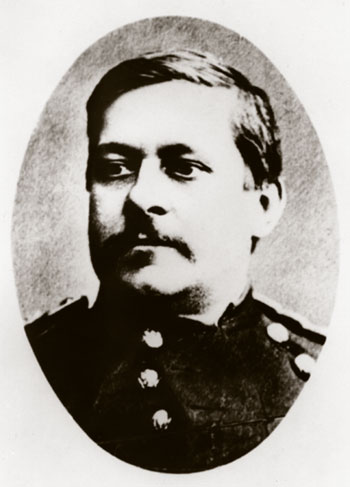
Major Marcus Reno
Reno Digs In
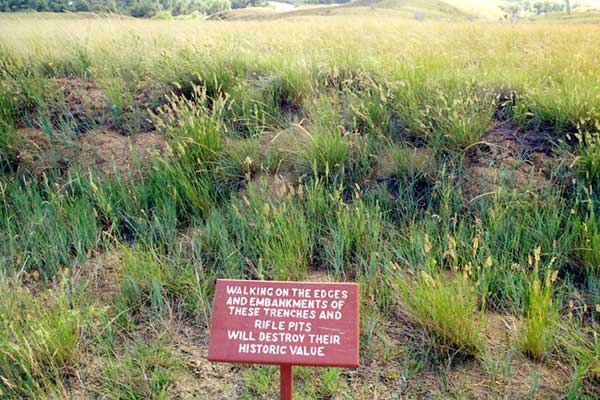
7.
7a.
7b.
Picture 7 looks south-- After Reno reached the defense site, Benteen arrived with his three companies after finding nothing on his
scout to the left. Following behind him came the pack train. All seven
companies would dig in around this area to form their defense site.
The center of this photo is where the field hospital was located.
Picture 7b looks north -- More rifle pits with Weir Point in the
center of the photo.
7c.
7d.
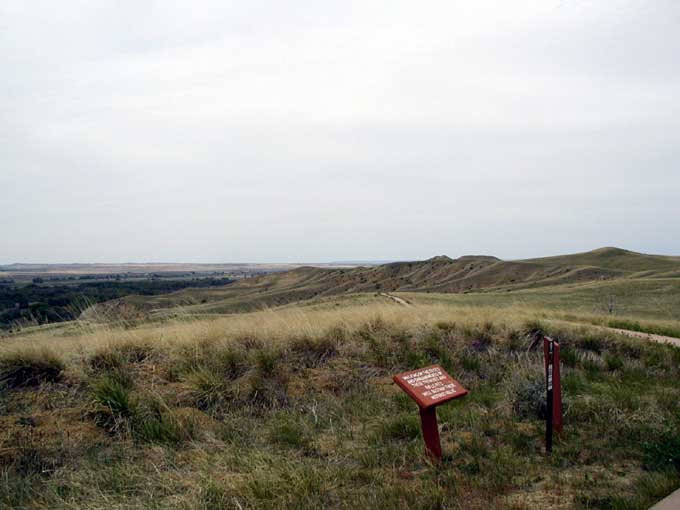
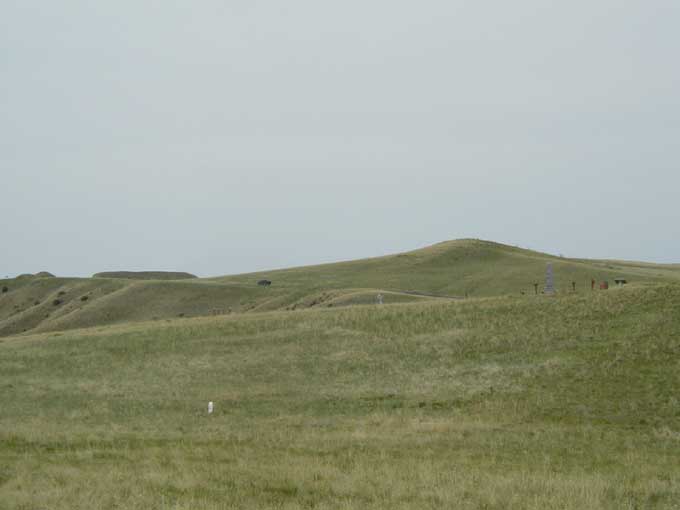
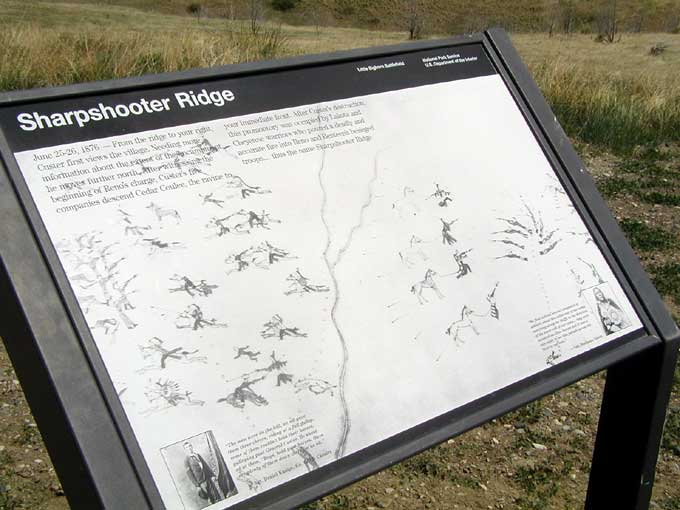
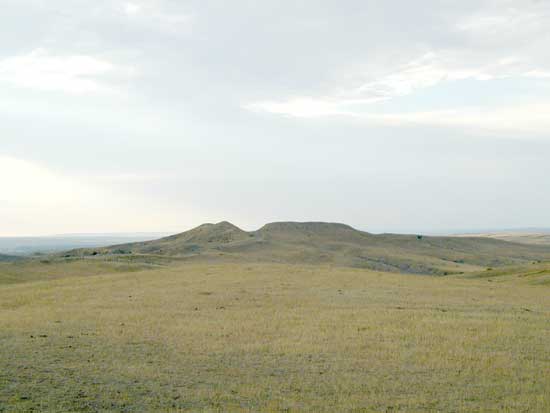
Picture 7c. looks north -- Sharpshooter's Ridge is in the center right
of the photo. From this vantage point a warrior or group of warriors
who were good marksmen did damage to the soldiers on the
northern lines, killing or wounding several before the troopers turned
their guns with full force upon the ridge. Firing ceased all together
from Sharpshooter's Ridge from then on. The white marker seen in the
left foreground is the general area of the field hospital.
Picture 7d. The Sharpshooters' wayside exhibit today.
Weir Point
8. 9.
9.a
Picture 8 looks north--Not long after the soldiers established
themselves, they noticed the Indian fire lessening and warriors riding
fast to the north along the valley floor. Soon the
soldiers of Reno and Benteen's commands heard firing far to the north.
Many of them thought Custer was giving the Indians a good fight.
Captain Thomas Weir, commander of Company D led his company
north towards Weir Point (seen in this photo) to locate Custer. The
remaining companies along with their wounded followed.
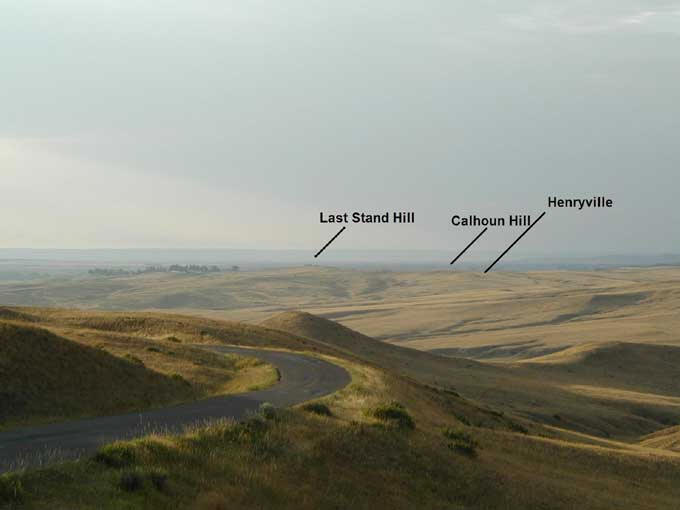
Picture 9 looks north--Once the troops reached the top of Weir Point
they could view the Custer Battlefield four miles to the north. It is
still hotly debated as to what they actually saw. It was about
5:00-5:30 p.m. June 25 when they searched for signs of Custer's
command. Men described seeing a lot of dust and smoke. Some saw
Indians shooting at objects on the ground. It is probable that they
were witnessing the mop-up operations of the Indians at the end of the
battle. A view of Last Stand Hill, Calhoun Hill and
Henryville--Henryville was so named after finding many Henry repeating
carbine cartridges during the archaeological dig of 1984, on a ridge
south of Calhoun Hill designating a warrior position.
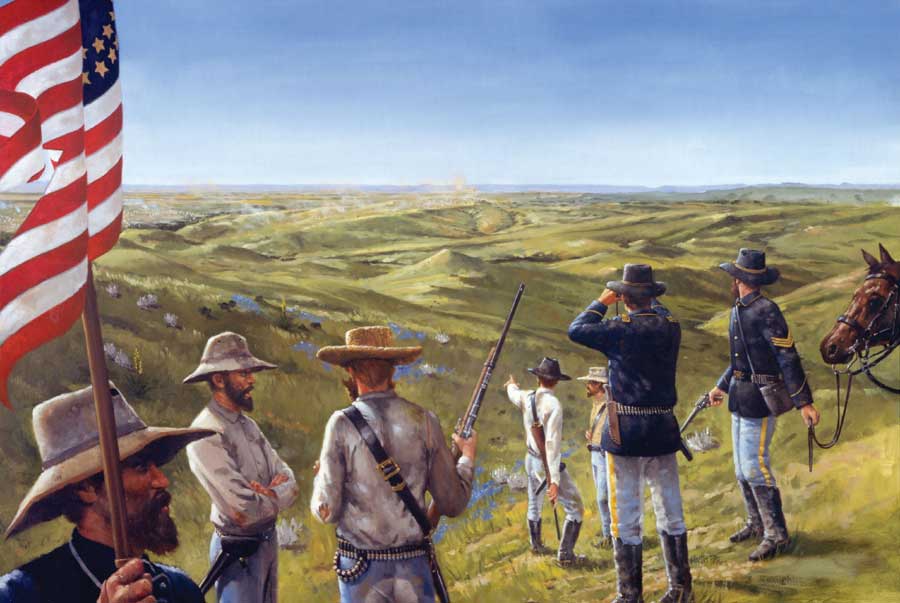
Picture 9a--Pate's "Weir Point."
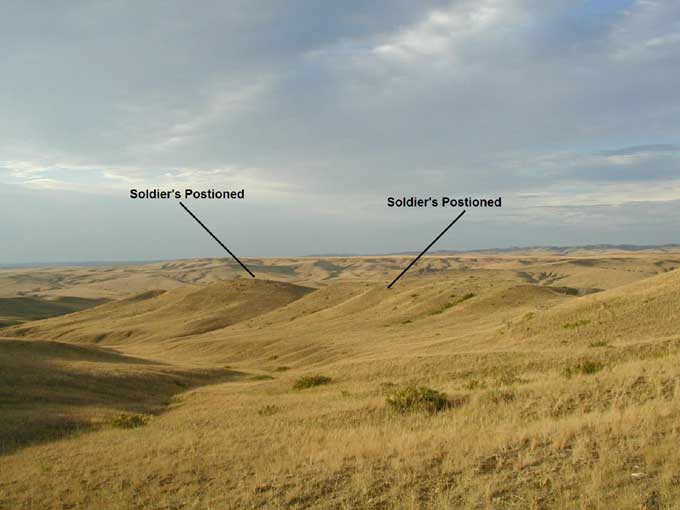
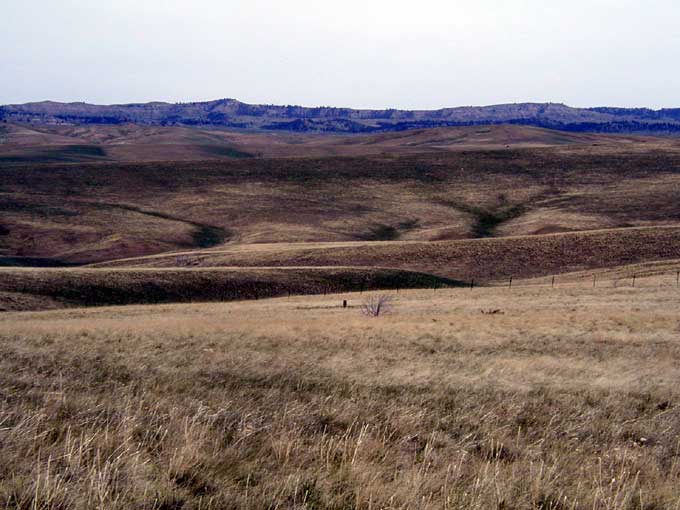
10.
10a.
Picture 10 looks NE--Reno would deploy the companies on Weir Point and north
along these bluffs. About 6:00 p.m. Reno's
soldiers were spotted by the Indians at the Custer Battlefield and
started to move fast in the direction of Reno's command. Reno would
pull his troops back to the Reno-Benteen Battlefield where they would
be besieged by the Indians throughout the night of June 25 and most of
the day of June 26, 1876.
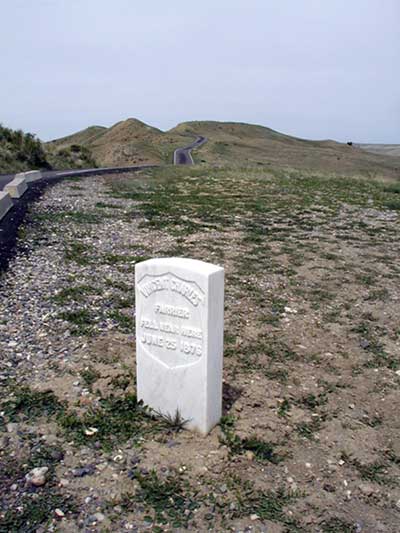
Picture 10a
looks north -- During the retreat from Weir Point, Farrier Vincent Charley
was wounded in the hip. He was overcome and killed by warriors before
Reno’s men could rescue him.
The Hilltop Fight
10b.
10c.
Reno lost 34 men during the valley fight and another 18
during the hilltop fight of June 25 - 26th. We cannot say for sure how
many warriors fell during the Hilltop Fight.
Photo 10b looks SW -- Pvt. Julian Jones was
killed beside Charles Windolph on June 26.
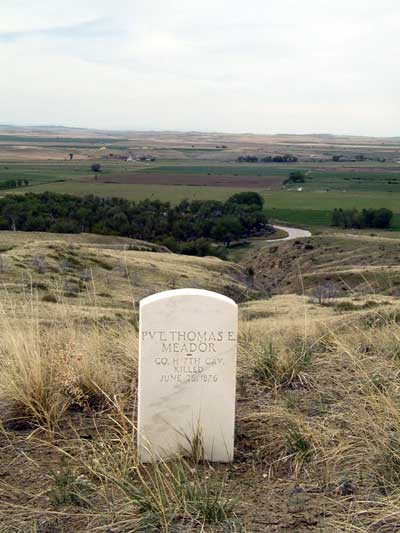
Photo 10c looks west -- Pvt. Thomas Meador was also
killed beside Charles Windolph on June 26. Windolph was very lucky for he
was wounded in the buttocks during the hilltop fight, but would
survive all other battle participants being the last one to die on March
11, 1950 in Lead, South Dakota. Windolph would also receive the
Congressional Medal of Honor for bringing water from the river to the
wounded.
Dr. Henry Porter would do his best to care for the
wounded. He established his field hospital in a slight depression between
the soldier lines. He surrounded his patients with dead mules, hard tack
boxes, and anything else he could put his hands on to protect the wounded
from incoming fire. It was in this place that Dr. Porter would amputate
the right leg of Saddler Michael P. Madden.
No clouds, no rain, and temperatures reaching into the
high 90s resulted in a desperate need of water for the wounded soldiers.
On June 26 the cavalrymen heard their comrades pleas for water from the field hospital.
A team of soldiers
moved down the steep bluffs, through what is known today as "water
carrier's ravine", to retrieve water from the river. Exposing
themselves, upon the bluffs, were some of the best sharpshooters from the
7th Cavalry firing their carbines into the brush along the banks of the
river providing covering fire for the water carriers.
24 Medals of Honor were awarded for the
Battle of the Little Bighorn from the Hilltop Fight. 19 for retrieving water from the river, for the
wounded, and as sharpshooters exposing themselves on the bluffs while
providing covering fire for the water carriers. Five were awarded for
individual actions.
Water Carriers:
Neil Bancroft
Abram Brant
Thomas Callen
Frederick Deetline
Theodore Goldin
David Harris
William Harris
Rufus Hutchinson
James Pym
Stanislaus Roy
George Scott
Thomas Stivers
Peter Thompson
Frank Tolan
Charles Welch
Sharpshooters:
George Geiger
Henry Mechling
Otto Voit
Charles Windolph
Individual Actions:
Benjamin Criswell of Company B, citation reads,
"Rescued the body of Lt. Hodgson from within the enemy's lines; brought up
ammunition and encouraged the men in the most exposed positions under
heavy fire." Hodgson was killed during the retreat and immediately after
crossing the Little Bighorn on the eastern bank.
Charles Cunningham of Company B, citation reads,
"Declined to leave the line when wounded in the neck during heavy fire and
fought bravely all next day."
Richard Hanley of Company C, citation reads,
"Recaptured, single-handed, and without orders, within the enemy's lines
and under a galling fire lasting some 20 minutes, a stampeded pack mule
loaded with ammunition."
Henry Holden of Company D, citation reads, "Brought up
ammunition under a galling fire from the enemy."
Thomas Murray of Company B, citation reads, "Brought up
the pack train, and on the second day the rations, under a heavy fire from
the enemy."
10d.
10e.
Picture 10d looks east -- Dog’s Back Bone, a Minniconjou warrior, concealed himself under the tall grass while firing
on the soldiers from the east. His fellow warriors became carelessly
excited in the heat of battle while standing to aim and fire.
Bravely exposing himself so as to warn these warriors that the solider guns were
powerful, Dog’s Back Bone
was shot square in the head and died instantly.
Dog's Back Bone's descendents visit the battlefield every year on
the anniversary of his death, June 26, to remember him. His marker can be
seen in the center of this photo taken from the east side of Reno's line.
Picture 10e -- Dog's Back Bone marker taken the day of
its unveiling, June 26, 2003.
Reno Is Rescued
The Indian village would pull stakes and move south toward
the Big Horn Mountains the evening of June 26. They had fought a great
battle and did not need to fight to the last man like the white soldier
did. The valley could provide resources for such a large village for only
a short time and, besides, there were new soldiers marching up the Little
Bighorn from the north and the Indians were in no mood to fight them.
11.
Those soldiers were infantry and cavalry under the command of General
Terry. Lt. Bradley, Gibbon's Chief of Scouts, would find the Custer dead
the morning of June 27. Terry's column then proceeded up the valley of the LBH until they found and rescued Reno and his
men.
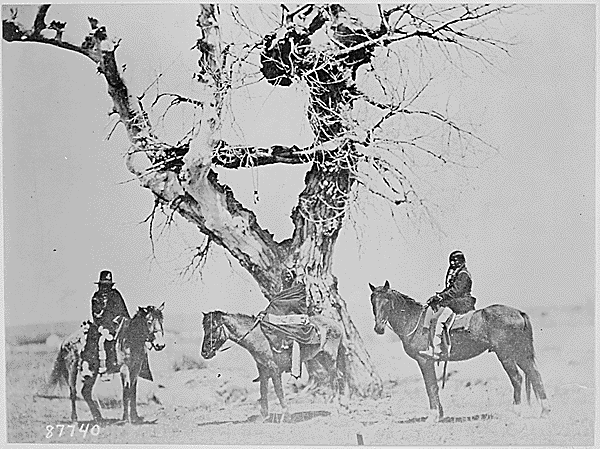
Picture 11 -- As Terry's column entered the
village area they found several Sioux tree burials within the village.
This photo was taken near Ft. Laramie of an Oglala tree burial. Photo
courtesy National Archives.
Reno's soldiers wondered where
Custer was. Terry informed Reno of the disaster that befell Custer's command to
the north. No one could believe this could happen. What did happen? Why hadn't
Custer supported Reno with the entire outfit? Many of these questions will never
be completely answered, but thanks to archaeological evidence, Indian
and soldier's accounts during the burial of Custer's men on June 28, 1876 we
have a broader understanding of what happened.